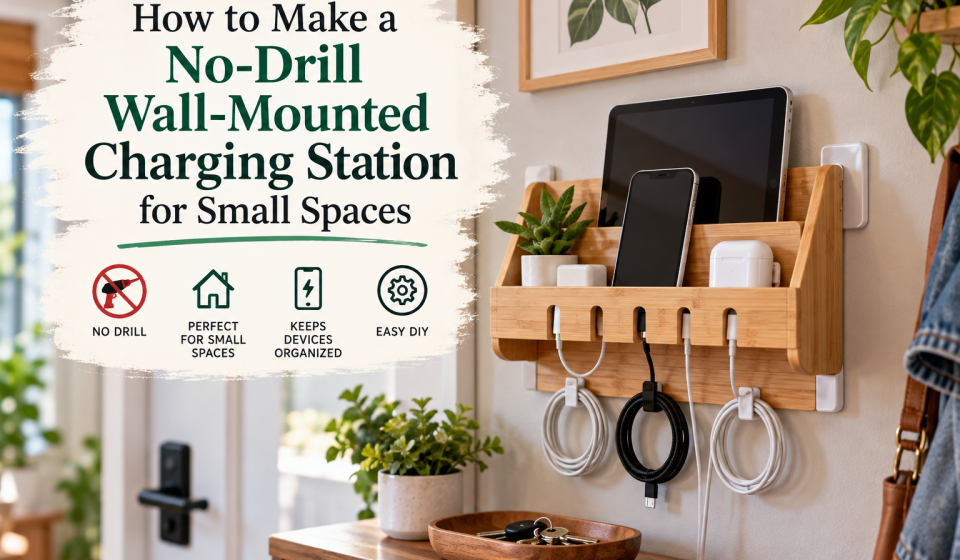

A no-drill wall-mounted charging station is a simple way to get phones, tablets, earbuds, watches, and other everyday devices off a crowded counter. This project uses removable adhesive, a lightweight organizer or shallow shelf, and a compact power setup—so you can create a tidy charging point without drilling holes or damaging the wall.
In this guide, you’ll learn how to choose a safe location, build the station, hide excess cable, protect your devices from heat and spills, and remove the setup cleanly when you move or rearrange the room.
What You’ll Need
The exact materials depend on the number of devices you want to charge and the type of wall surface you have. A basic setup can be made with the following:
- A lightweight wall-mounted organizer, narrow shelf, mail sorter, or small basket
- Removable, weight-rated adhesive mounting strips or adhesive hooks
- A compact power strip or multi-port USB charging hub
- Charging cables in the lengths you need
- Reusable cable ties, adhesive cable clips, or hook-and-loop straps
- A microfiber cloth and a small amount of rubbing alcohol for surface preparation
- A measuring tape, pencil, and level
- Optional: a cable sleeve, cord channel, label stickers, and a non-slip shelf liner
Choose a holder with a solid back or mounting surface. An open wire basket can work, but it may be more difficult to attach securely and may allow phones to slide out. A shallow wooden, plastic, or metal organizer is usually easier to mount and organize.
Plan the No-Drill Wall-Mounted Charging Station
Good planning matters more than the assembly itself. The station should be convenient, secure, and close enough to an outlet that the power cord does not stretch across a walkway.
Choose the best location
Look for a spot near an existing outlet, such as the side of a desk, the wall beside a nightstand, or the area near an entryway table. Avoid locations where the station could be hit by a door, bumped by furniture, or exposed to water.
For a bedroom, a charging station near—but not directly beside—the bed can prevent cables from trailing across the floor. In a home office, mounting one under or beside the desk keeps devices visible without using valuable desktop space. Near an entryway, a small organizer can hold phones, keys, and earbuds in one place.
Check the wall surface
Removable adhesive products work best on smooth, clean, dry surfaces. Painted drywall, finished wood, glass, metal, and many laminates are suitable, provided the paint is fully cured and the surface is not dusty or greasy.
Use extra caution on wallpaper, textured paint, brick, unfinished wood, and recently painted walls. Adhesive may not bond reliably, or removal may pull away the surface. If you rent, test the adhesive in a hidden area first and follow the manufacturer’s removal instructions.
Estimate the weight
Add the weight of the empty organizer, the power hub, cables, and the devices that may rest inside it. Choose mounting strips with a capacity comfortably above the total rather than relying on the exact limit.
Remember that pulling a phone out of a holder creates more force than the phone’s simple resting weight. A shallow organizer with a broad back is generally more stable than a narrow box attached at only two small points.
How to Make a No-Drill Wall-Mounted Charging Station
1. Measure the available space
Measure the width and height of the wall area, then check the distance to the nearest outlet. Make sure there is enough clearance to plug in the power strip without sharply bending the cord.
Place the organizer temporarily against the wall and imagine using it with one hand. The best height is easy to reach but high enough to keep the station away from children, pets, floor-level dust, and accidental spills.
2. Prepare the organizer
Clean the back of the organizer according to the adhesive manufacturer’s directions. If the surface is smooth and nonporous, wipe it with a small amount of rubbing alcohol and allow it to dry completely. Do not apply adhesive over dust, oil, loose paint, or moisture.
If the organizer has a glossy finish, check the mounting-strip instructions before lightly roughening it. Some materials should not be sanded, and damaging the finish can weaken the bond. When possible, use a product designed for the organizer’s material.
3. Create a cable plan before mounting
Decide where each device will sit and which cable will reach it. Separate the cables by purpose—for example, phone, tablet, watch, and earbuds—so you do not end up with a tangled bundle.
For a tidy result, position the charging hub inside the organizer or directly beneath it. Feed only the cable ends into the storage area. Secure the extra cable length behind the organizer with hook-and-loop straps rather than stuffing it loosely into the holder.
If the charging hub is too large to fit safely inside, mount the organizer above it and use adhesive clips to guide the cables down. Leave enough slack for comfortable use, but not so much that a cable can hang to the floor.
4. Apply the adhesive mounting strips
Use enough strips to support the organizer evenly. Place them near the upper and lower portions of the back rather than clustering them in one corner. If the holder has a wide back, several smaller strips distributed across the surface can provide better support than two strips at the center.
Press each strip firmly into place. Avoid touching the adhesive surface with your fingers, since skin oils can reduce its grip. Follow the product’s instructions for the required waiting period before adding weight.
5. Mount the organizer
Use a level or carefully measure from a nearby horizontal surface. Position the organizer, press it against the wall, and hold it firmly for the time recommended by the adhesive manufacturer.
Do not immediately fill it with devices. Many adhesive products need time to develop their full bond. Waiting before loading the station is one of the simplest ways to prevent the organizer from sliding or falling.
6. Add the power hub and cables
Once the adhesive has set, place the power strip or USB charging hub where it has ventilation and cannot easily be knocked down. Plug it directly into the wall outlet whenever possible. Avoid connecting one power strip to another.
Route the charging cables through the organizer or along the wall using low-profile cable clips. Labeling the cable ends can be helpful if several look alike. Leave a small amount of extra length at each device so the connector is not pulled sideways during use.
7. Test every connection
Plug in one device at a time and check that each cable fits securely. Look for loose connectors, unusually warm plugs, damaged insulation, or cables that are under tension.
After everything is connected, gently test the organizer with an empty hand. It should not shift, tilt, or separate from the wall. If it moves, remove the load and solve the mounting problem before using the station.
Ways to Make the Station Safer and Tidier
Keep heat under control
Do not cover a charging hub with clothing, paper, or a tightly packed pile of devices. Leave ventilation around adapters, especially if several devices charge at once. Avoid placing the station above a radiator, heater, or other warm appliance.
Use chargers and cables that are in good condition and suitable for the devices. Replace frayed, crushed, or cracked cables rather than hiding the damage with tape.
Prevent cable clutter
- Use one cable length per device instead of keeping several feet of excess cord in the organizer.
- Attach a small cable clip near each charging position so connectors do not fall behind the station.
- Bundle extra length with reusable straps, not permanent knots.
- Use a cable sleeve when several cords travel together toward the outlet.
- Label cables at both ends if more than one connector type is in use.
Protect small devices
Line the bottom of a hard organizer with a thin piece of non-slip shelf liner or felt. This can reduce sliding and protect phones from scratches. If you use a narrow pocket for earbuds or a smartwatch, check that the device does not press against the charging connector at an angle.
Do not place drinks, cosmetics, or other spillable items in the charging organizer. A charging station should have one job: keeping electronics powered and organized.
Common Mistakes to Avoid
- Mounting on a dirty wall: Dust and grease can cause adhesive to fail early.
- Ignoring the weight limit: Count the organizer, charger, cables, and devices together.
- Loading it too soon: Adhesive often needs a waiting period before it can support weight.
- Using a deep or front-heavy holder: The farther the weight sits from the wall, the more leverage it creates.
- Hiding a warm power adapter: Chargers need airflow and should not be buried under fabric or paper.
- Stretching cables across a walkway: Reposition the station or use a proper cord-management route.
- Pulling adhesive straight outward during removal: Many removable strips are designed to be stretched slowly in the direction shown by the manufacturer.
How to Remove the Charging Station Without Damage
When you are ready to move the station, unplug everything and remove the devices. Take off the organizer only as directed by the adhesive manufacturer. For stretch-release strips, pull the tab slowly and parallel to the wall rather than yanking the holder outward.
If the adhesive is stuck, stop and reassess instead of prying aggressively. A putty knife can gouge paint or drywall. After removal, gently clean any residue with a product suitable for the wall finish, testing it in an inconspicuous area first.
Frequently Asked Questions
Can I mount a charging station on drywall without drilling?
Yes. A lightweight organizer can often be attached to smooth, sound drywall with removable adhesive strips. Choose a holder with a broad mounting surface, stay within the product’s weight rating, and allow the adhesive to set before adding devices.
What is the best place for a wall-mounted charging station?
The best location is close to an outlet, easy to reach, protected from water, and away from walkways or heat sources. A wall beside a desk, entryway table, or nightstand is usually practical.
Can the power strip go inside the organizer?
It can if the organizer is large enough and the power strip remains ventilated, stable, and accessible. Do not pack it tightly with fabric or paper, and do not hide a warm adapter where air cannot circulate.
How many devices should one station hold?
That depends on the charging hub, organizer size, and mounting capacity. For a small space, three or four everyday devices are often easier to manage than filling one holder with every cable in the home.
What if adhesive will not stick to my wall?
Do not force the setup. Textured, dusty, damp, or delicate surfaces may not provide a dependable bond. Consider a freestanding organizer, an over-the-door holder, or a removable furniture-mounted solution instead.
With a lightweight holder, a sensible cable layout, and the right removable mounting method, a no-drill wall-mounted charging station can turn an unused section of wall into a compact and useful part of your daily routine.