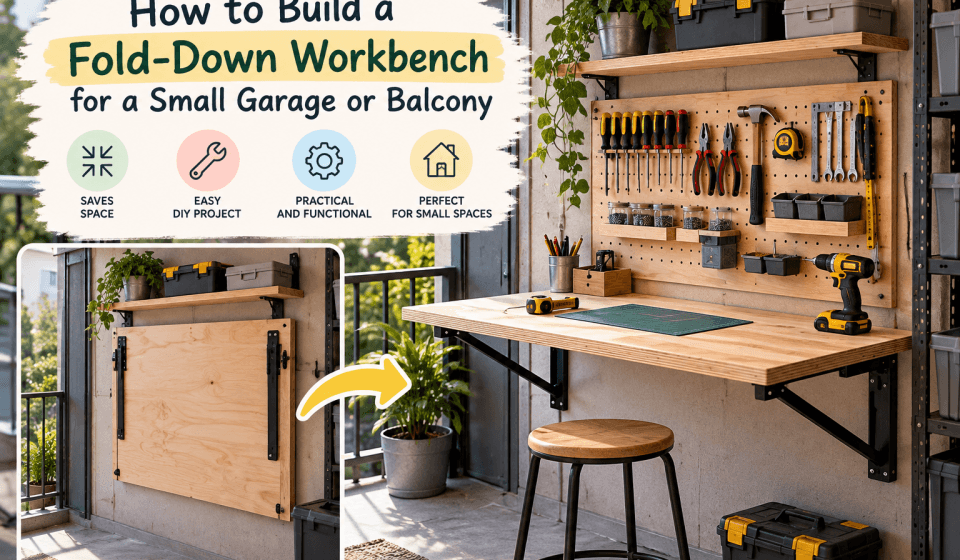

A fold-down workbench is one of the most practical ways to add a useful work surface without sacrificing valuable floor space. This project shows you how to build a sturdy fold-down workbench for a small garage, shed, laundry area, or covered balcony, using common timber, a plywood top, folding brackets, and reliable wall fixings.
You will learn how to choose the right size, select suitable hardware, anchor the bench safely, build the frame, and protect it from moisture. The design is compact when folded and strong enough for hand tools, small repairs, gardening tasks, and light DIY projects.
Planning Your Fold-Down Workbench
The best workbench size depends on the space available and the jobs you expect to do. A useful starting size is 1,200mm wide by 600mm deep. That gives enough room for most household repairs while remaining manageable in a narrow garage or balcony.
If space is particularly tight, reduce the depth to 450mm. For larger projects, a 1,500mm-wide bench may be more comfortable, but it will need stronger brackets and a wall with enough clear space.
Choose a comfortable height
A general-purpose work surface is usually comfortable at roughly waist height. For many adults, that means about 850mm to 950mm from the floor. Your own height and the type of work matter more than an exact measurement.
- Use a slightly lower surface for heavy hand-sanding or forceful assembly.
- Use a slightly higher surface for detailed craft, electronics, or model work.
- Check that the folded bench will not block a door, walkway, window, or storage cabinet.
Before buying materials, mark the proposed height and width on the wall with masking tape. Open and close the bench area as if you were using it, and confirm that there is enough room for your legs, tools, and nearby equipment.
Materials and Tools
The following materials suit a typical 1,200mm by 600mm fold-down workbench. Adjust quantities if you choose a different size.
Materials
- One sheet of 18mm plywood, cut to 1,200mm by 600mm for the benchtop.
- Timber for a supporting frame, such as 45mm by 70mm or similar structural stock.
- Two heavy-duty folding shelf brackets or folding workbench brackets.
- Wall fasteners suited to the wall type: masonry anchors for brick or concrete, or structural screws into wall studs.
- Wood screws for assembling the frame and attaching the top.
- Two folding latches, barrel bolts, or another method of securing the top when folded.
- Sandpaper, wood glue, and a durable paint, varnish, or exterior wood finish.
Choose brackets with a stated load capacity comfortably above the weight you expect to place on the bench. The rating should apply to a pair or to each bracket as clearly specified by the manufacturer. Avoid relying on light-duty decorative shelf hardware.
Tools
- Tape measure, pencil, spirit level, and square.
- Circular saw or handsaw.
- Drill and drill bits appropriate for timber and masonry.
- Screwdriver or driver bit.
- Clamps, if available.
- Stud finder for framed walls.
- Wrench or socket set for masonry anchors and structural bolts.
- Safety glasses, hearing protection, and a dust mask when cutting or drilling.
How to Build a Fold-Down Workbench
1. Inspect the wall before cutting anything
The wall is the most important part of the structure. A fold-down bench is only as secure as the surface supporting it. Brick, concrete, and solid block can usually accept appropriate masonry anchors. A plasterboard or drywall surface needs fasteners installed into studs or a properly fitted structural backing frame.
Do not attach a load-bearing bench to plasterboard anchors alone. If the wall studs do not line up with the desired bench position, install a substantial horizontal mounting board across several studs, or consult someone experienced with structural fixings.
On a balcony, confirm that drilling is permitted and that the wall or railing is designed to accept fixings. Never attach a workbench to a railing unless it is specifically suitable for that purpose.
2. Cut and prepare the benchtop
Cut the plywood to your chosen dimensions, or have it cut at a hardware store. Check the edges for splinters and lightly round the front corners if the bench will be installed in a narrow walkway.
Sand all exposed edges. Apply paint, varnish, or another finish to both faces and all edges, particularly if the bench will be used on a balcony or in a damp garage. Sealing the edges helps reduce swelling caused by moisture.
For a tougher surface, add a replaceable hardboard skin, laminate, or sacrificial plywood layer on top. This protects the main top from glue, paint, drilling, and scratches.
3. Build a shallow support frame
A simple timber frame beneath the plywood makes the top stiffer and provides solid areas for attaching the folding brackets. Build a rectangular frame from the structural timber, keeping it slightly smaller than the plywood on all sides.
For a 1,200mm by 600mm top, a frame approximately 1,140mm wide by 540mm deep is a practical starting point. Use two long rails, two end rails, and at least one central crosspiece. The crosspiece reduces flex in the plywood and gives you another place to secure the top.
- Cut the rails and crosspiece to length.
- Lay them on a flat surface and check the frame for square.
- Pre-drill near the ends to reduce the chance of splitting.
- Apply wood glue where appropriate and join the frame with structural wood screws.
- Check that the frame remains square before the glue sets.
Position the frame so the brackets will support the strongest parts of the bench. Avoid placing a bracket directly at the very edge of the plywood, where it may cause damage or provide limited support.
4. Attach the plywood top
Place the plywood on the frame and align the edges. Drill pilot holes through the top into the frame, spacing screws roughly 200mm to 300mm apart around the perimeter and at the central support.
Use screws long enough to hold the top securely without penetrating the working surface. Countersink the heads slightly so they do not catch tools or damage workpieces. Wipe away excess glue and sand any rough spots.
5. Install the wall mounting board
A wall mounting board spreads the load across multiple fixings and gives you a straight, strong surface for attaching the brackets. Use a substantial piece of timber at least as wide as the bracket mounting plates.
Hold the board against the wall at the planned bench height. Use a spirit level to mark a perfectly horizontal line, then mark all fixing locations.
For masonry, drill the correct hole diameter and depth for the anchors you are using. Clean dust from the holes before inserting the anchors. For a stud wall, position the screws through the mounting board and into the center of at least two studs whenever possible.
Tighten the fixings firmly, but do not crush soft timber or damage the anchor. Check the board again with a level after tightening.
6. Fit the folding brackets
Attach the folding brackets to the wall mounting board according to the manufacturer’s instructions. Place them symmetrically and keep them far enough from the sides to avoid interfering with the frame.
For a 1,200mm-wide bench, brackets positioned approximately 150mm to 200mm in from each end are a reasonable layout. A third central bracket may be useful for a deeper or heavier bench, provided all brackets fold in the same direction and do not collide.
With the brackets folded down into their working position, place the workbench on top. Check that it is centered, level, and fully supported. Mark and drill pilot holes through the bracket plates into the underside frame, then secure the bench with suitable screws or bolts.
7. Test the folding action
Raise and lower the bench slowly several times. Watch for rubbing, twisting, loose hardware, or brackets that do not lock fully into position. The top should rest flat and remain level when open.
If the bench drops slightly at the front, check that the brackets are level and fully engaged. Do not compensate for a structural problem by simply adding more weight or tightening random screws.
When the bench folds upward, use latches or a locking strap to hold it against the wall. This prevents the top from falling unexpectedly, especially in a busy garage or shared balcony.
Making the Workbench Stronger and More Useful
Add a front edge strip
A timber strip fixed beneath the front edge stiffens the plywood and provides a convenient place for clamps. Make sure it does not interfere with the brackets or prevent the top from folding flat.
Install a removable tool rail
A shallow rail or pegboard section above the bench can hold frequently used tools without taking up floor space. Leave enough clearance for the bench to fold and avoid storing heavy items high on the wall.
Use a replaceable work surface
A thin sacrificial board is useful for drilling, gluing, and painting. Secure it with a few screws or clamps so it can be replaced when worn. If you plan to use a bench vise, mount the vise near a supported corner and verify that the brackets and wall can handle the sideways force.
Consider a folding leg for heavier work
Folding brackets are suitable for many light and medium-duty tasks, but heavy planing, chopping, or forceful hammering can place significant stress on the wall. For those jobs, add a folding front leg, removable support post, or separate trestle. A second support transfers some of the load to the floor instead of relying entirely on the wall.
Safety and Balcony Considerations
Use the bench only within the capacity of the brackets, fasteners, wall, and worktop. The weakest component determines the safe load. Keep heavy objects near the wall rather than at the front edge, where they create more leverage.
- Wear eye protection when cutting, drilling, or driving fasteners.
- Keep fingers clear of folding bracket hinges and pinch points.
- Lock the brackets completely before placing tools on the bench.
- Do not stand, sit, or climb on the worktop unless it was specifically designed for that purpose.
- Use weather-resistant materials and cover the bench when installed outdoors.
- Check local building, rental, or property-management rules before drilling into a balcony wall.
For an exposed balcony, ordinary interior plywood and untreated steel hardware may deteriorate quickly. Choose exterior-grade plywood, corrosion-resistant fixings, and a finish rated for outdoor use. Even then, avoid leaving the bench wet for long periods.
Common Mistakes to Avoid
- Using the wrong wall anchors: A strong bracket cannot make an unsuitable anchor safe.
- Skipping pilot holes: Large screws can split the frame or mounting board, especially near an edge.
- Making the top too deep: A deep bench may be awkward to fold and can place excessive leverage on the wall.
- Ignoring the folded position: Check clearance around doors, windows, shelves, and walkways before installation.
- Overloading a light-duty design: A compact folding bench is not automatically suitable for heavy woodworking.
- Failing to seal plywood edges: Moisture often enters through the edges first and causes swelling.
FAQ About a Fold-Down Workbench
How deep should a fold-down workbench be?
A depth of 450mm to 600mm works well for most small garages and balconies. Choose the shallowest size that accommodates your tools and projects, because a deeper top creates more leverage on the wall fixings.
Can I attach a fold-down workbench to drywall?
Yes, but the load-bearing fixings must connect to wall studs or a properly installed structural backing board. Drywall anchors alone are generally not suitable for a workbench that will receive impact or heavy loads.
Are folding shelf brackets strong enough for a workbench?
Some heavy-duty folding brackets are suitable, but lightweight decorative brackets are not. Check the manufacturer’s load rating, installation requirements, and recommended spacing. Consider a folding leg or extra support for demanding work.
What is the best top material?
18mm plywood is a practical choice because it is strong, relatively light, and easy to cut. Exterior-grade plywood is preferable in damp or outdoor locations. A replaceable hardboard or plywood layer can protect the main surface.
How do I stop the bench from moving when I work?
Use correctly sized brackets, solid wall anchors, and a level mounting board. For tasks involving heavy downward or sideways force, add a folding leg, removable support, or floor-standing trestle. Make sure all folding mechanisms are fully locked before use.
A carefully planned fold-down workbench can turn an unused wall into a practical project area while keeping the floor clear. Prioritize a sound wall connection, suitable brackets, a sealed worktop, and enough support for the jobs you actually do. Build those elements correctly, and the bench should remain convenient, stable, and easy to fold away when the space needs to serve another purpose.